Disneyland is happening! In 3 weeks! And so begins my Disney crafting frenzy. For the next 3 weeks I will be posting a Disney-related DIY project to celebrate my upcoming trip to the Happiest Place on Earth! First project: button Mickey ears! I've been wanting to do something to whittle down my extensive button collection and since buttons = round and Mickey ears = round, buttons = Mickey ears. Craft math at its finest.
Since I went button-Mickey crazy, this post is super long! I've separated this post into 4 different sections. Each bold heading signals a new project. Each heading is followed by a materials list and directions, specific to each project.
Mickey Pendants
Materials
- 2 small buttons (or beads) & 1 large button
- 2 headpins (1 for each ear)
- wire cutters
- E6000
- small amount of felt or fabric
- scissors
- Tacky glue
Pick a button for Mickey's head. You want a flat surface so that the pendant will stay upright when used as a necklace or keychain. If your button has something sticking out of it, no worries, just snip it off with wire cutters.
To make Mickey's ears I used a variety of beads and buttons (I made 10 variations so the pictures might not match up.) The method behind both is the same: use headpins to attach the button or bead to the larger button. Trim your wire so that it does not extend past the end of the larger button. I used jump rings to make attaching chains to my pendant easier.
Use E6000 on the larger button and on the headpin wire to attach the smaller bead or button to the larger button.
Repeat with the remaining bead.
Let your Mickey ears dry overnight.
I decided to add fabric to the back of my pendants because I knew that seeing the exposed wire and glue would bug me. The fabric backing may also prevent your clothes from being snagged by the wire. I cut out a small circle of black fabric that measures smaller than the larger button.
Put some Tacky glue onto the back of your larger button.
Place your fabric or felt circle onto the glue. Gently press down, making sure to clean up any excess glue. Let it dry.
Your Mickey ears are complete!
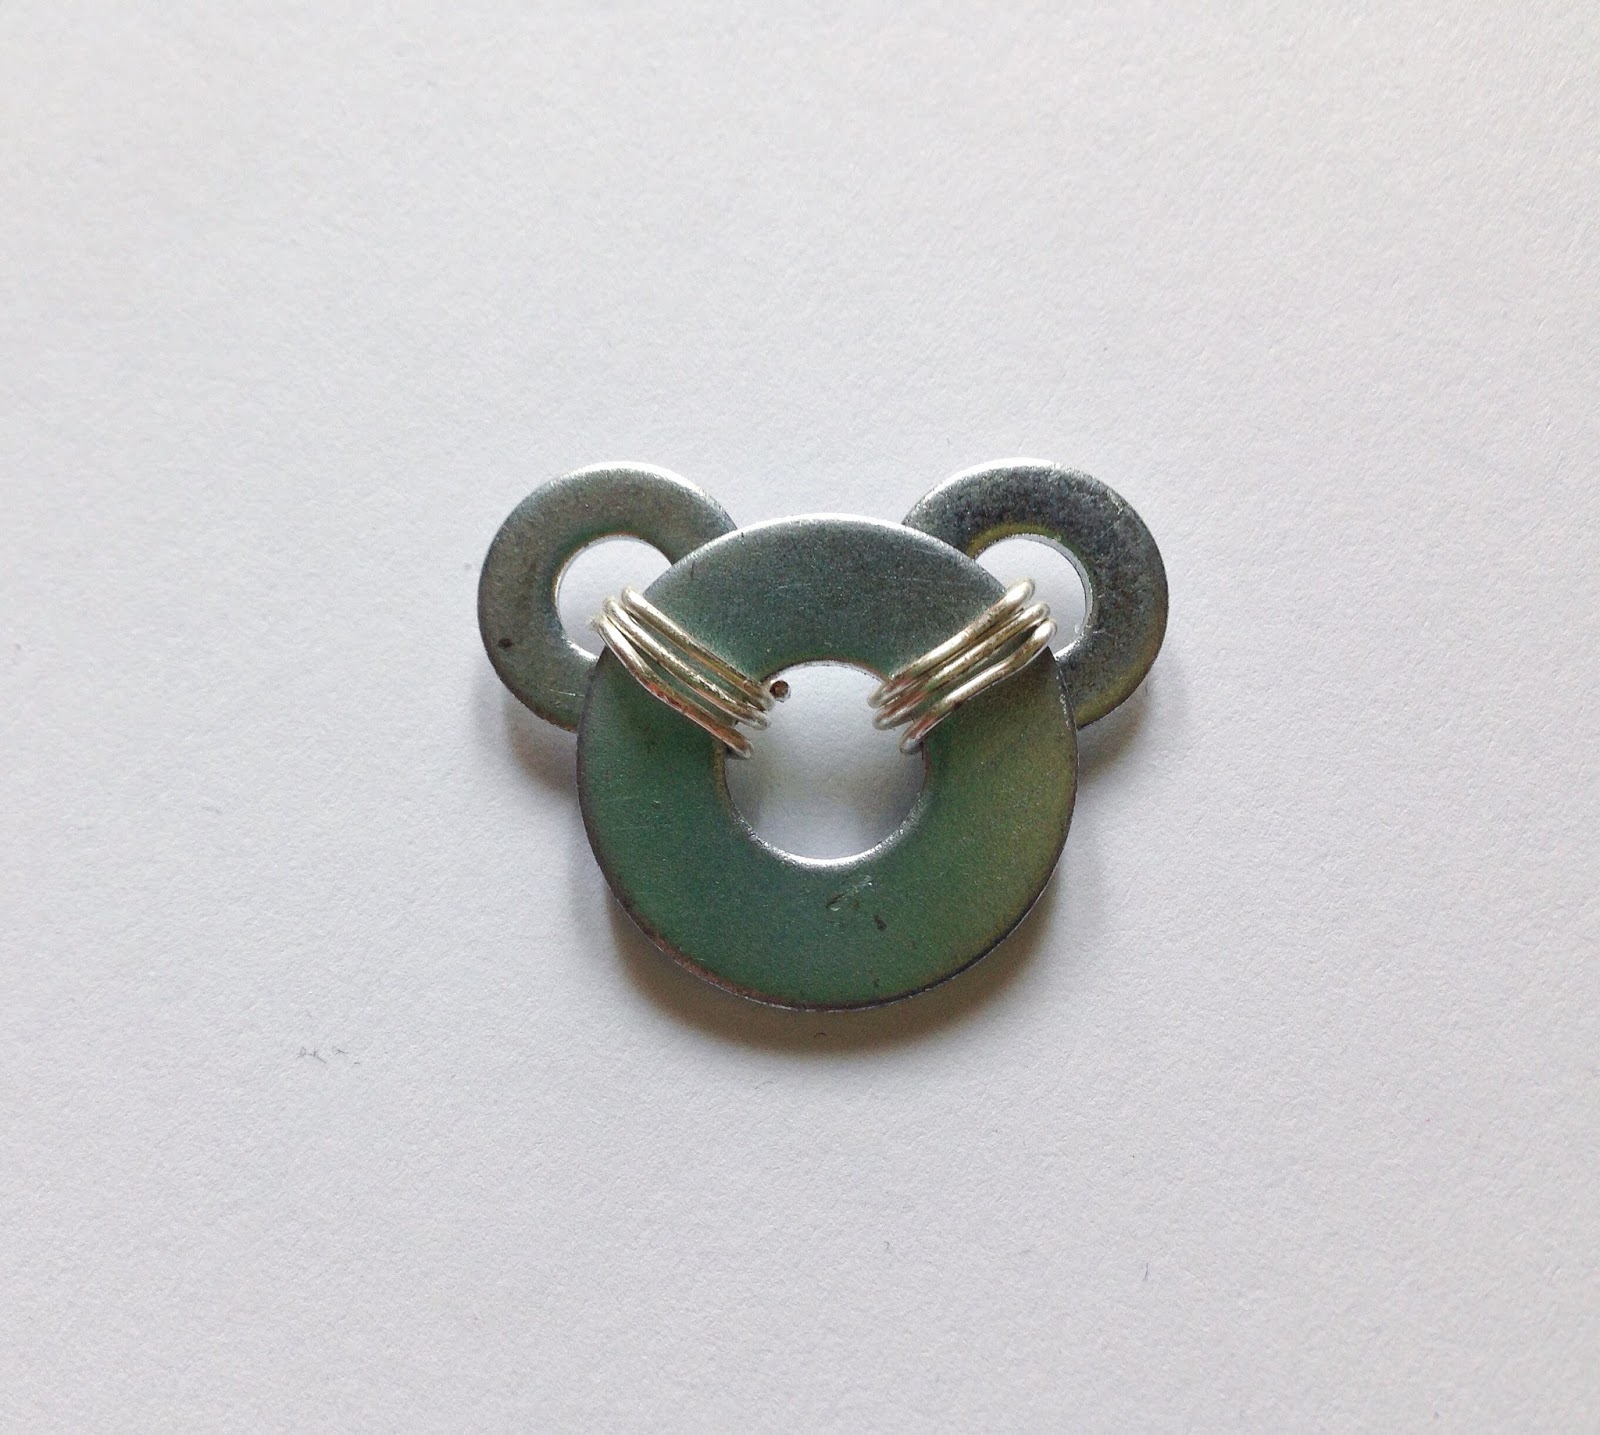
Wire Wrapped Mickey
Materials
- 2 small washers & 1 large washer
- wrapping wire (20 gauge)
- pliers
Cut a piece of wrapping wire about 2 inches long. I chose to put my smaller washers behind my large washer (this pic shows the back side for some reason). Place your washers so they resemble Mickey ears.
Insert your wire through the middle of the small washer, over the the large washer (where the small and large washers overlap), and wrap it under and around the larger washer. Your wire should make a U-shape. Continue to use your pliers to wrap and pull the wire to tighten it. Flatten the wires by applying light pressure from your pliers to secure your washers into place.
Repeat the same process for the other ear. (Wire-wrapping takes practice and patience. I tend to get really enthusiastic about a project and then get frustrated when I struggle with the process aka wire-wrapping. Taking a break to clear my head usually rids me of any annoyance.)
Mickey Hair Accessory
Materials
- 2 small buttons & 1 large button
- E6000
- bobby pin
Select 3 buttons to make your Mickey ears. Apply E6000 to the the sides of the two small buttons and the sides of the large button. Let dry.
Apply glue to the back of the large button and to the flat edge of your bobby pin. Make sure that no glue seeps in between the bobby pin itself or else it won't open. Press together and let dry overnight.
Ring-Shaped Mickey
Materials
- 2 round beads
- ring
- headpins or wire
- pliers
My mom had some pretty beads and a ring lying around and I knew I had to do something Mickey-related with them. The result is a simple wire-wrapped Mickey.
I just opened the headpins with my pliers, placed the wire around the ring, and closed the headpin around it. If you don't have headpins, use wire and your pliers to create loops to hold the bead into place.
Repeat the process with the other bead and you're done!
Mickey squad.
I must've spent at least an hour figuring out which buttons to pair together which isn't surprising given my slightly perfectionist nature. Anyway, I'm really happy with how these turned out and am tempted to make more! Stay tuned for another Disney DIY coming next week. :)
♥ Justine


0 comments:
Post a Comment