
Materials
- White shrinky dink paper. Used
- scissors
- thin black Sharpie
- colored pencils
- hole punch
- toaster oven or regular oven
- thin cardboard
- embroidery thread
I used Grafix Shrink Film in white.

I used a thin black Sharpie and a colored pencils for each diamond. Before using colored pencil on shrinky dink paper, be sure to use sandpaper to rough up the surface so the colored pencil will "stick." I used 440 grit Wet/Dry abrasive paper. Try testing out the pencils on un-sandpapered shrinky dinks to see the difference.

The steps I took to make each diamond.
- I cut out a diamond shape and used abrasive paper to sand the entire diamond shape. I then used a thin black Sharpie to outline the diamond. I used a gray colored pencil to draw the inner lines of the diamond.
- I then colored in each section of the diamond with colored pencils.
- Then I punched a hole at the top of the diamond.
- And finished with writing each kid's name on the diamond using a thin black Sharpie.

Here's the shrink size reference. The larger diamonds are pre-shrink and the little diamond is post-shrink. Prior to putting your shrinky dinks in the toaster oven, put them on a thin cardboard to prevent them from sticking to the metal tray. I used part of a cereal box. I set my toaster oven to 325 degrees Fahrenheit and put them in the oven. Leave them in the oven until they have stopped curling and become flat and small.

The third diamond I made next to the first diamond I made. After trial and error I realized that I was not evenly sanding my diamonds and that the black inner lines of the diamond interfered with the readability of each name (diamond on the right). So the result of a more even sanding plus using gray colored pencil for the inner lines resulted in a much neater looking diamond.

After making a couple diamonds I came up with the idea of writing "Rainbow Diamonds" on the back of each diamond. The left diamond is Sharpie on a diamond that already had shrunk. The right diamond was the result of writing on the back of the diamond with Sharpie, prior to shrinking. The right one definitely looks neater.

I initially wanted to make the diamonds into bracelets, but I figured that my kids would be more interested in necklaces. I chose to use colored embroidery thread to go with the rainbow theme.

I knew I wanted to print out pictures I took of the kids, including an individual shot taken on their birthdays but I wanted to do something extra special. I happened to find some yellow star shaped cut-outs at work and thought it'd be cute to glue each child's picture to a star and hang their personalized rainbow diamond necklace "around" their necks.

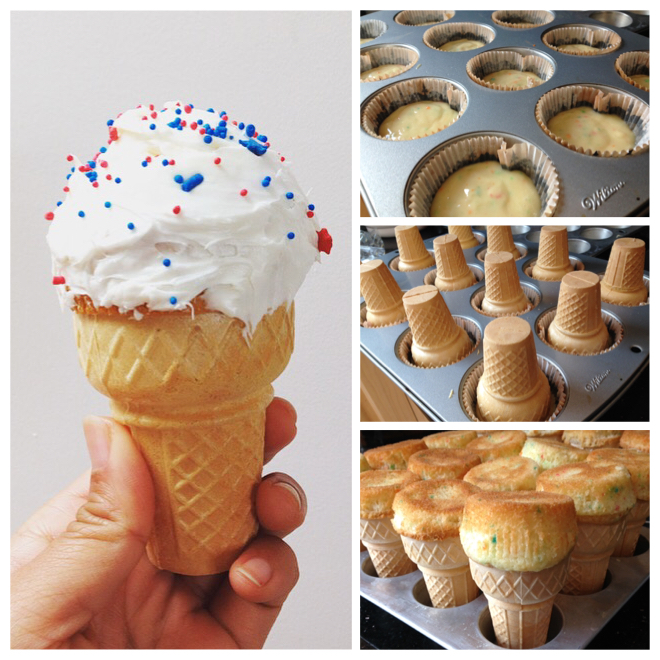
I also utilized my Pinterest addiction and decided to make these ice cream cone cupcakes for our class party! They were surprisingly easy to make and the kids loved them.
I'll miss my kids. They've truly made a difference in my life. #proudteacher
♥ Justine


0 comments:
Post a Comment